If your kids bedroom is starting to look a little cramped and outdated it might be time to refresh their space with a creative and fun theme.
Today in House of Monarch we show you how to update their space with a fun Under-the-Sea theme that the kids are sure to love. All it takes is some creative painting and a few artistic elements to really transform the space.
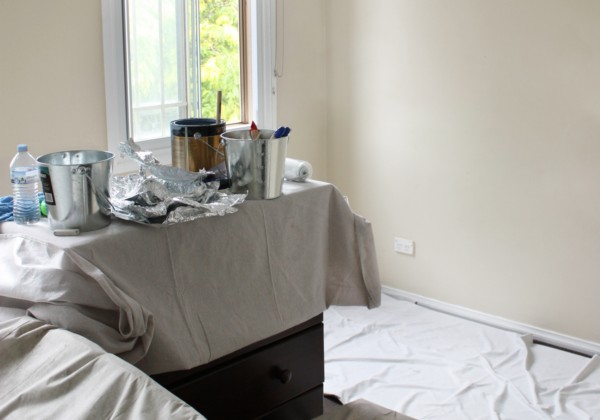
For rooms that are particularly cluttered, it’s a bad idea to do any painting without moving everything out of the room to make space. Any larger items that are harder to move can be stacked in the centre of the room and protected from paint splatter with a Monarch Leak-Proof Canvas dropsheet. Protect your floors with more dropsheets and make sure your walls are clean and free from dust, grime and spiderwebs. Kids bedrooms in particular may need a wash down with sugar soap to get rid of any finger prints or sticky spots.
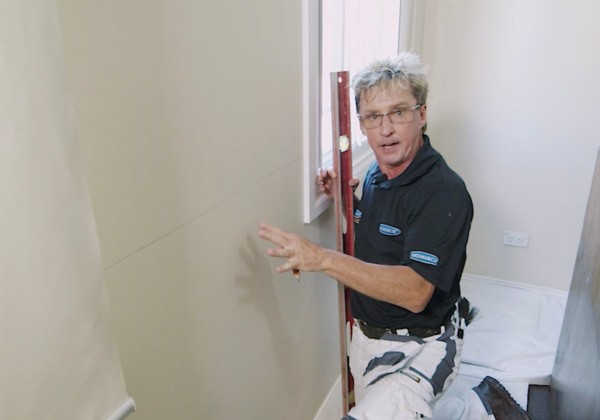
While we’re eventually going to be adding a wave pattern, the basis of this repaint is a split wall effect. Use a tape measure and pencil to mark the height of the colour split and use a level to continue the line around the whole room. If you don’t have a large level; use the tape measure to mark the correct height at intervals and draw lines between them with a large ruler or other straight edge.
Pro Tip… Use a pencil line instead of painters tape on the walls as we will be rolling past the line to ensure a crisp transition between colours.
Pro Tip… Use a pencil line instead of painters tape on the walls for the first colour as we will be rolling past the line to ensure a crisp transition between colours.

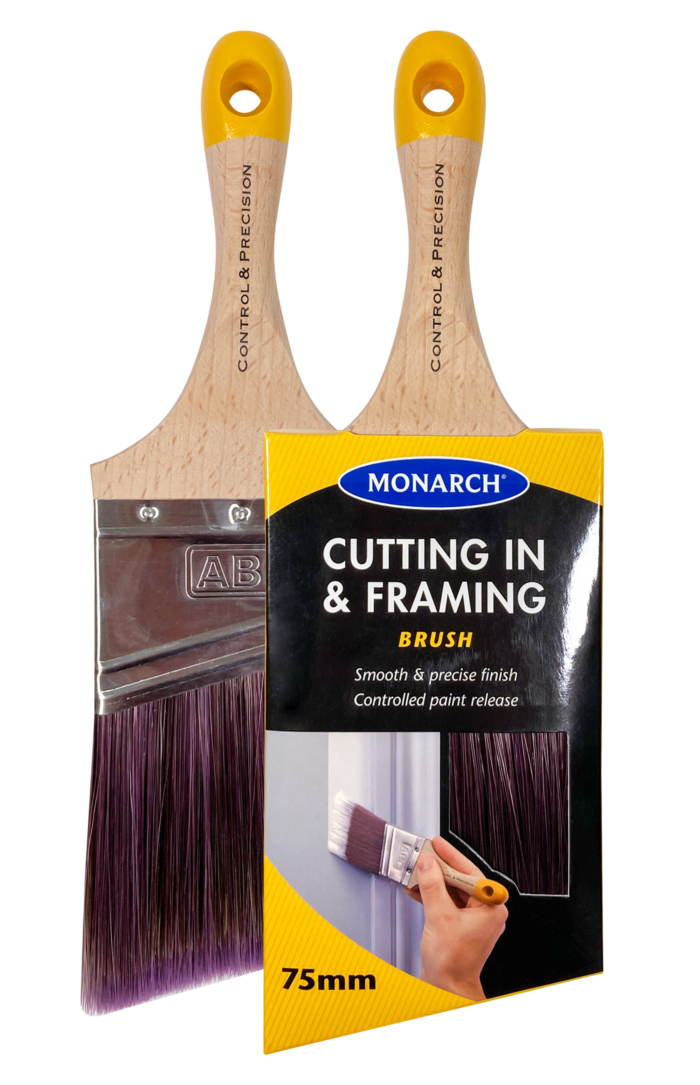
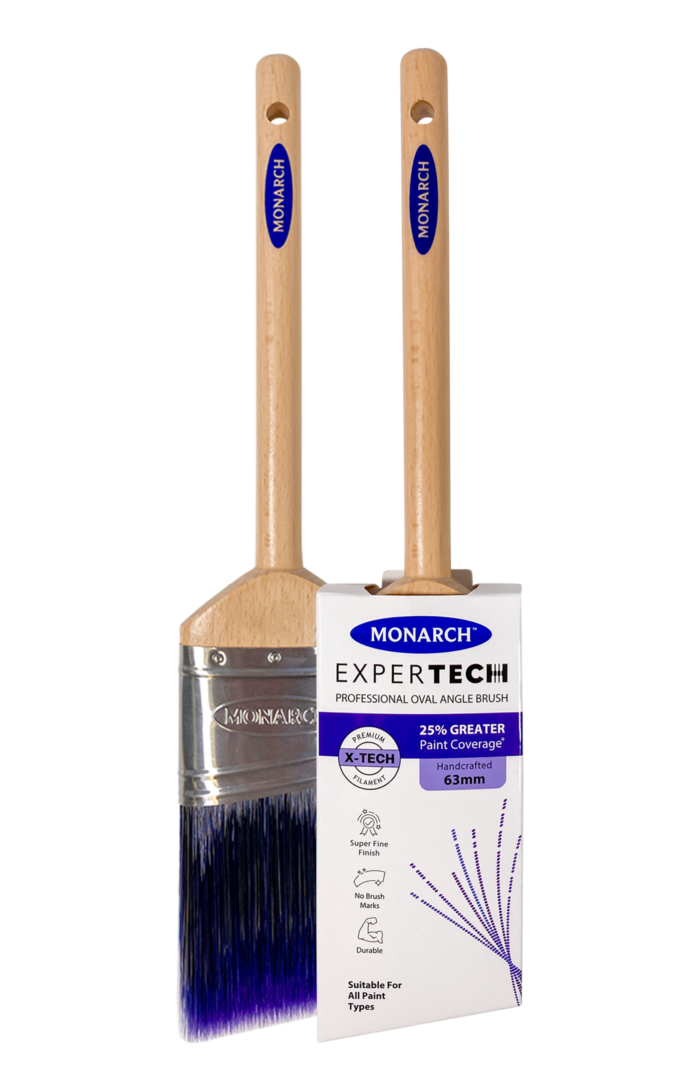
Once your paint has been stirred according to the can’s directions, it’s time to cut in the upper walls of the room. Use a Monarch Cutting In & Framing brush cut in the top half of the room, including around doors, windows and any fixtures.
While the cutting in paint is still wet, start rolling the walls. Load your Monarch 230mm Walls & Ceilings roller cover with paint and apply paint in smooth strokes up and down the wall. Roll down to and just past the pencil line to ensure a smooth transition to the second colour. Depending on the previous wall colour you may need more than one coat of paint. Refer to your paint can for the ideal recoat time.
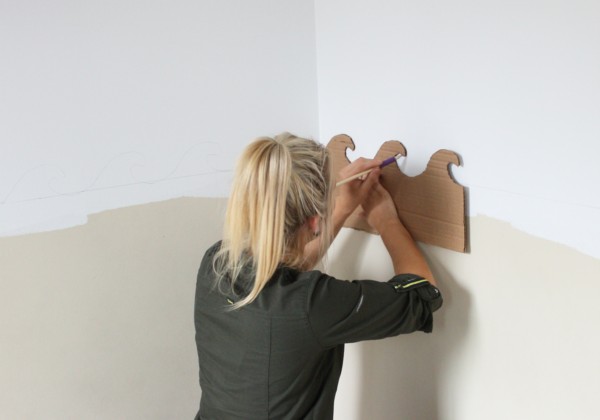
Using a spare piece of carboard, draw a wave pattern that’s to your liking (psst – we used Google images for our wave shape inspiration). Cut around the top side of the wave to create the stencil edge that you can use for tracing. When tracing, have the stencil positioned so the bottom curve of the waves touches the pencil line that you drew in Step 2; this will keep your waves level around the room.
Pro Tip… Pay attention when moving your stencil to the next section that the edges line up neatly with the last section you traced.
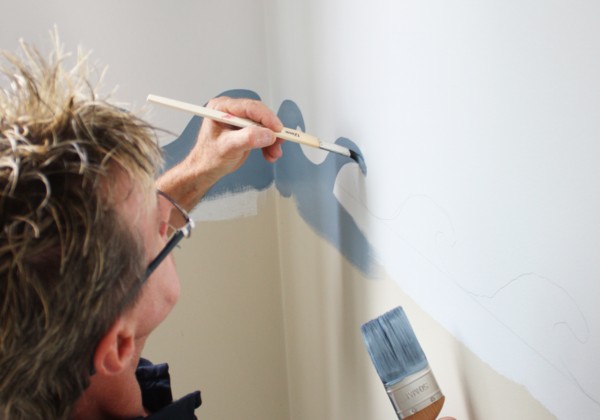
To paint these waves, you not only need a steady hand but also a couple of fantastic quality paint brushes to help with the smaller details. Using your ocean blue paint colour, start painting the waves from the bottom of the stencil (where it’s wider). We recommend using a 50mm Monarch Advance Oval Cutter as it has great precision to help achieve the curved shape. For the smaller tip of the wave, you’ll need a smaller brush like the Monarch 12mm Bevel Liner to help get around those tight curves. This step is quite time consuming but the effect will be worth it!
Pro Tip… Make sure to paint down a few inches below the bottom of the waves to make rolling in the next step easier.
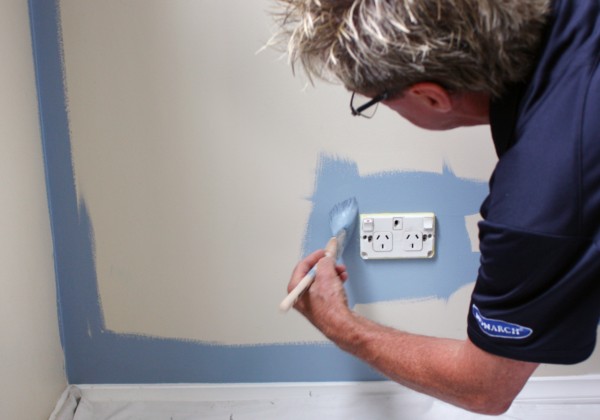
With the tricky waves out of the way you can go ahead and cut-in the lower part of the wall, using your Monarch Cutting In & Framing brush to go around the skirting boards, doors, windows, power points and other fixtures. While the cutting in paint is still wet, roll the lower walls using the same up/down technique as Step 3.
Pro Tip… If you’re worried about your kids tastes changing as they grow, choose a darker, more mature blue that can be reapplied to remove the wave pattern in the future.
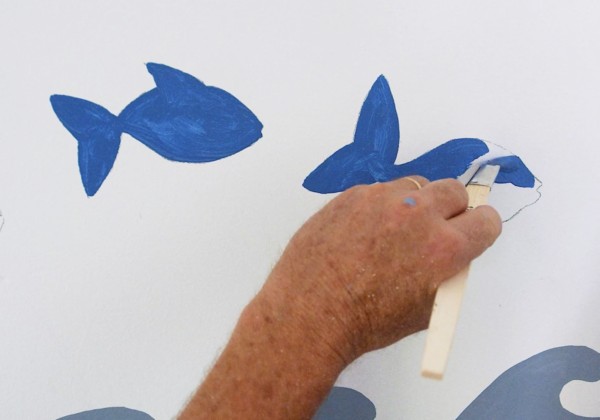
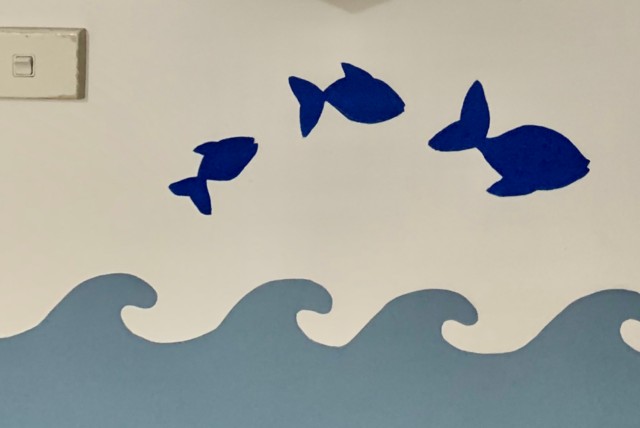
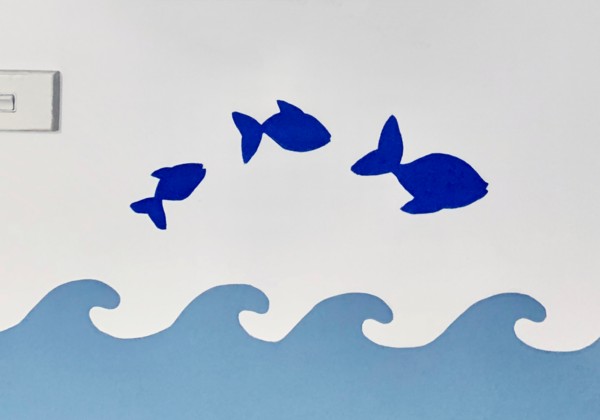
To really bring the Under the Sea theme to life, think about adding some extra painted sea creatures to prime locations in the room; around light switches, between windows, or at the bed head. Use a pencil to draw your shapes onto the walls, either using a stencil like Step 4 or freehand if you’re feeling confident. Use the Monarch Advance Oval brush for the larger areas and the 12mm Bevel Liner for the fine details.
Pro Tip… Depending on your colours, you may need to do multiple coats of paint. Refer to your paint tin for the recommended recoat times
Now that the painting is done, pour any left-over paint back into the tin, wash out your brushes, rollers and trays and store for next time. If you used painters’ tape for your cutting in make sure you remove it before the paint dries to keep your paint edges crisp.
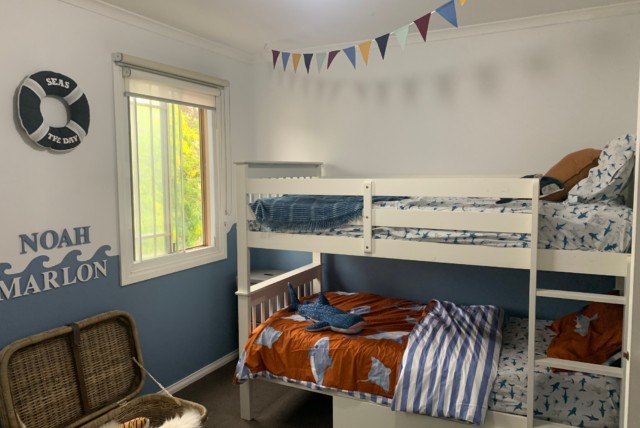
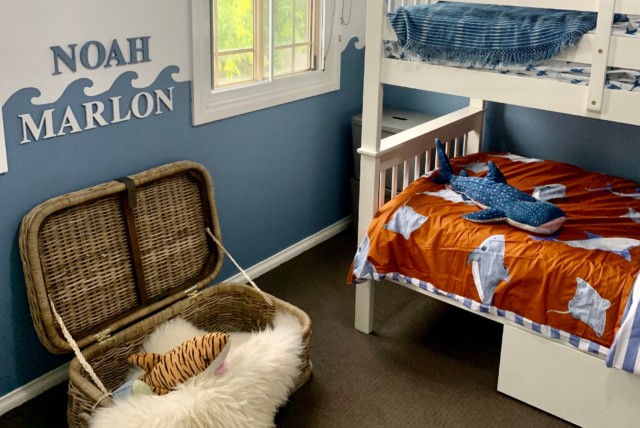
As kids grow they accumulate a lot of stuff so refreshing their room is the perfect time to re-evaluate the space and make sure it still works for them.
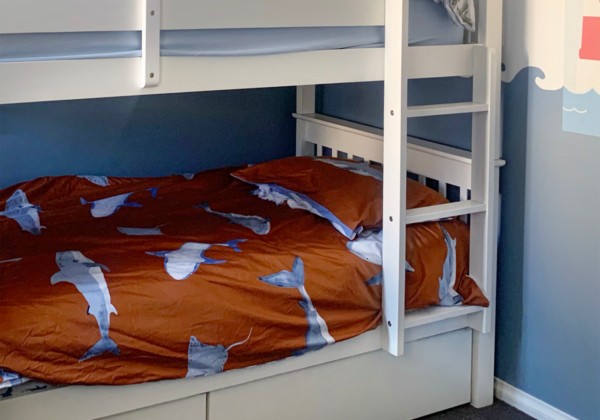
In our room we had 2 single beds taking up a lot of floor space so a bunk bed was the perfect solution.
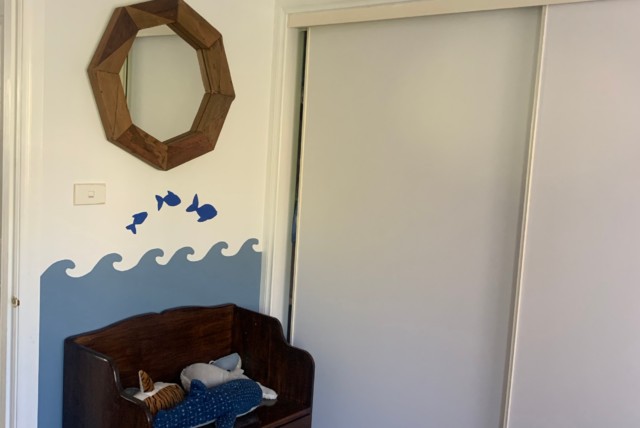
Also think about creative storage solutions like under bed storage, or a small floor chest that can double as a seating bench.
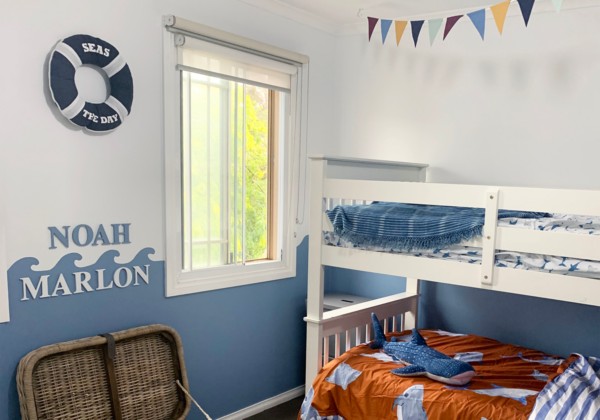
The Under the Sea theme has a lot of flexibility. Blues are a classic choice but don’t be afraid of branching out with wood tones, striped light houses, colourful shells and creatures, or even a whole underwater city!
Get the kids involved and get creative, and if you need any help, check out our Kids Bedroom Design Ideas to get the details of our room makeover.