



A wainscoting feature does not have to mean a complicated makeover. With the right colour, thoughtful preparation and painting tools suited to each stage, you can create a bedroom wall that feels considered and personal.
From controlled brushwork around detailed edges to smooth application across larger surfaces, choosing the right tool for the job can make the process easier.
Explore the Monarch range of brushes, rollers, mini rollers and protection products to find the painting tools that suit your next project.
Step-by-step Guide
Step 1: Plan Your Colour
Start by deciding how you want the wainscoting to work with the rest of the wall. Do you want the panelling to stand out with a contrasting shade, or blend into the room with a more cohesive colour palette?
Consider the existing colours in the bedroom. Your wall colour should work with the flooring, furniture and soft furnishings rather than competing with them.
It can also help to think about where you want the eye to go when you enter the room. If the wainscoting is the feature, a stronger colour can make it stand out. If you want a calmer look, keep the tones closer together.
Step 2: Protect The Room
Once you’ve decided on your colour scheme, prepare the room for painting. Move furniture away from the walls and cover anything that could be exposed to paint, including floors, furniture and nearby windows.
Monarch Leak Proof Canvas Drop Sheets are made from canvas with a plastic backing designed to stop paint soaking through. They can be used to cover furniture, floors and windows while painting or decorating.
For polished floors, tiles and other slippery surfaces, Monarch also offers Heavy Duty Non-Slip Canvas Drop Sheets with a non-slip rubber backing.
Taking a few minutes to protect the room before you begin can make the painting process much easier and help minimise clean-up once you're finished.
Step 3: Prepare The Surface
Proper surface preparation gives your paint a clean, smooth base, which can help you achieve a better finish.
Check the wall and wainscoting for dents, holes, cracks or areas that need attention. Fill suitable imperfections, allow the filler to dry and lightly sand the repaired areas until smooth. Be sure to remove any sanding dust before you start painting.
If the existing surface has a glossy finish, you may also need to prepare it to help the new paint adhere correctly. Always check the preparation and application instructions provided with your chosen paint.
Step 4: Prepare Your Painting Tools
Preparing your painting tools before you begin can help them apply paint more evenly and give you greater control throughout the project.
For water-based paint, we recommend rinsing brushes and roller covers before use to remove any excess lint or loose fibres. Wash the roller thoroughly under the tap and squeeze out excess water. You can attach it to the frame and spin it against a suitable surface to help remove excess moisture before loading it with paint.
For your paint brush, soak it in around an inch of water for 10 minutes, then shake out any excess moisture. Both your brush and roller should be damp rather than wet, as excess water can lead to drips and affect the application of your paint.
Once your tools are prepared, have your paint brush, roller, tray and other painting tools within easy reach. Having everything prepared means you can move smoothly between detailed areas and larger surfaces, while maintaining a consistent, wet edge as you work.
Step 5: Cut In The Detailed Areas
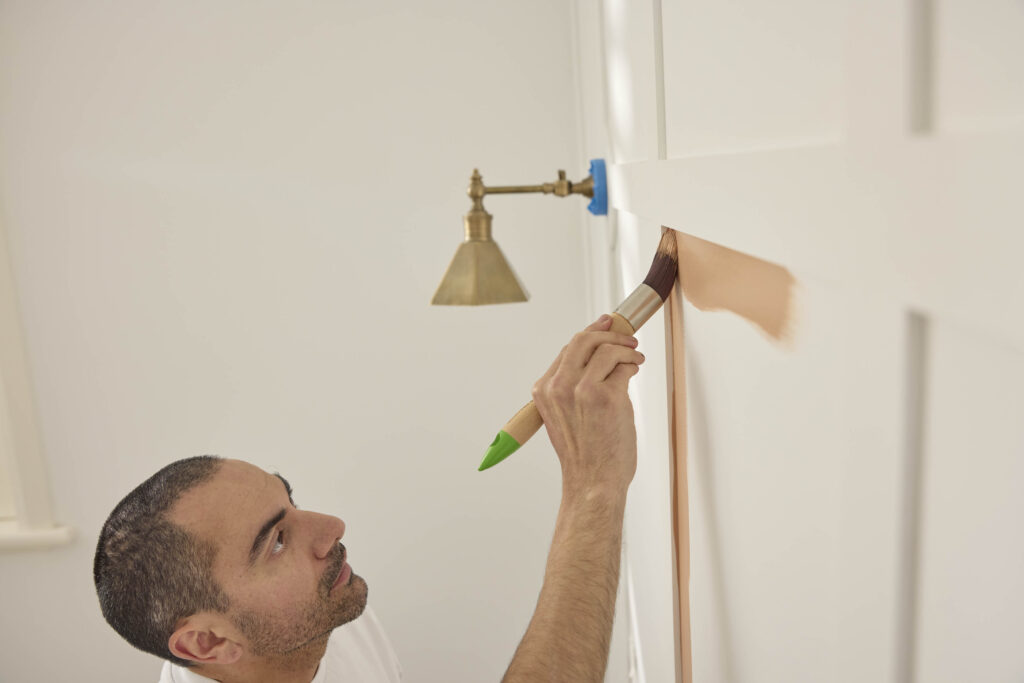
Start with the sections that require the most precision. Use a MONARCH Walls, Doors & Trims Brush to cut in around corners, edges and the detailed areas of the wainscoting.
For greater control, load your brush lightly by dipping only the lower third of the bristles into the paint. Gently tap the brush against the inside of the paint bucket to remove any excess paint before applying it to the wall.
Work in manageable sections rather than trying to tackle the entire room at once. When painting trims, start with the edges before moving onto the flatter surfaces. This helps catch any paint that may have moved over the edge as you work.
Take your time around the panel edges and other detailed areas. Controlled brushwork will help you achieve a cleaner, more precise finish before moving onto the larger surfaces.
Step 6: Roll The Larger Surfaces
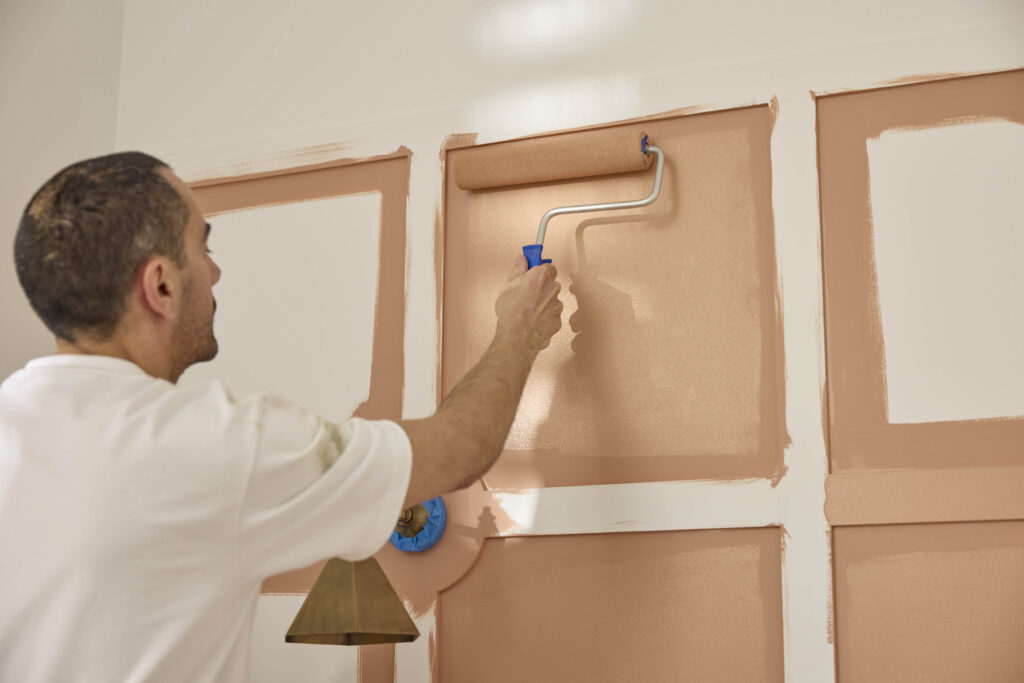
Once the cutting in is complete, it’s time to move onto rolling the panels.
The MONARCH Doors, Trims & Cupboards Roller Cover is designed to provide a smooth, even finish with low-sheen or semi-gloss paints.
To load your roller, dip it into the paint tray, then roll it back and forth over the loading surface — the flat, grooved section of the tray. Continue until the roller is evenly coated, taking care not to overload it, as excess paint can cause drips.
Once again, apply the paint in manageable sections, working consistently across the surface to maintain a smooth finish. Avoid pressing too heavily on the roller; let the tool do the work.
For smaller or hard to reach areas of wainscoting, the MONARCH Doors, Trims & Cupboards Mini Roller can give you greater control, making it easier to achieve an even finish.
Step 7: Allow The Coat To Dry
Allow the first coat time to dry completely before moving onto the next one.
While it can be tempting to speed up the process, painting over wet or partially dried paint can lead to streaks, lumps and an uneven finish. Always follow the drying times provided by the paint manufacturer before applying another coat.
Step 8: Finish And Style
Once the final coat is dry, it's time to bring the room back together. Remove your drop sheets and protective coverings, then return your furniture and styling pieces to the room.
Take a step back and look at the wainscoting as part of the entire space. Add your bedding, artwork, lighting and furniture and consider how they work with your new wall colour.
The best wainscoting ideas don't need to be complicated. A considered colour choice, careful preparation and the right paint tools can be enough to give your bedroom a completely refreshed look.


